Creating a New Obsidian Vault: A Comprehensive Guide
Written on
Chapter 1: Overview of the Vault Rebuild
I am in the process of completely reconstructing my Obsidian Vault. If you're curious about my motivations, you can find more information in my article or watch the accompanying video here:
Getting Started
To begin, I won't make any assumptions about your current knowledge, but I will presume that you have already downloaded and set up Obsidian. Once that’s done, the next step is to create a new vault. Before doing so, there are two important considerations:
- What will you name your vault?
- Where will you store it?
#### Choosing a Vault Name
Naming inanimate objects might not be for everyone, but it holds significance for me. For instance, I’ve named my car Kate and my freezer Prince Ali. So, choosing a name for my vault is crucial. My previous vault was called “Second Brain 1.0,” a term I’ve never truly resonated with. The concept of a second brain is not physically possible, and visually, it lacks appeal.
In contrast, I am genuinely enthusiastic about the idea of the Extended Mind. If you haven’t explored Annie Murphy Paul’s insightful book on this subject, I highly recommend it. The Extended Mind encompasses the environment around you, including how you organize your workspace—this concept beautifully aligns with Dan Charnas’s book, Everything In Its Place. It carries a somewhat sci-fi vibe, suggesting the ability to extend one's mind beyond oneself, which could inspire fiction writers.
Thus, I've decided to name my new vault "Extended Mind 1.0."
Why the Versioning?
As I mentioned in the video and article titled “Why I’m Doing This,” I anticipate the need to rebuild or restart my vault periodically. To manage this, I plan to use versioning based on:
- Iterations: Each time I start from the exported setup of the new vault, I will increment the version number (e.g., 1.1, 1.2, or date-based like 1.2022–10–01, 1.2023–01–30).
- New Builds: If I undertake a completely new setup, I will move to version 2.0.
Storage Options for the Vault
Before we proceed, it’s worth noting that I primarily use Windows and Android, although I occasionally reference an iPad. If you utilize iCloud, it’s essential to research its features, especially regarding synchronization capabilities, which we will cover in a future article. I don’t have firsthand experience with iCloud, but I’m aware it offers certain benefits and potential drawbacks.
Now, back to my setup: I use both Google Drive and OneDrive, which admittedly complicates things a bit. All my previous vaults are saved in OneDrive under a straightforward folder labeled "Obsidian Vaults." I will continue this practice for my new vault.
Now, let’s take a look at the initial setup steps. I’ll guide you through each one after the video.
Step-by-Step Setup Instructions
- Open Obsidian.
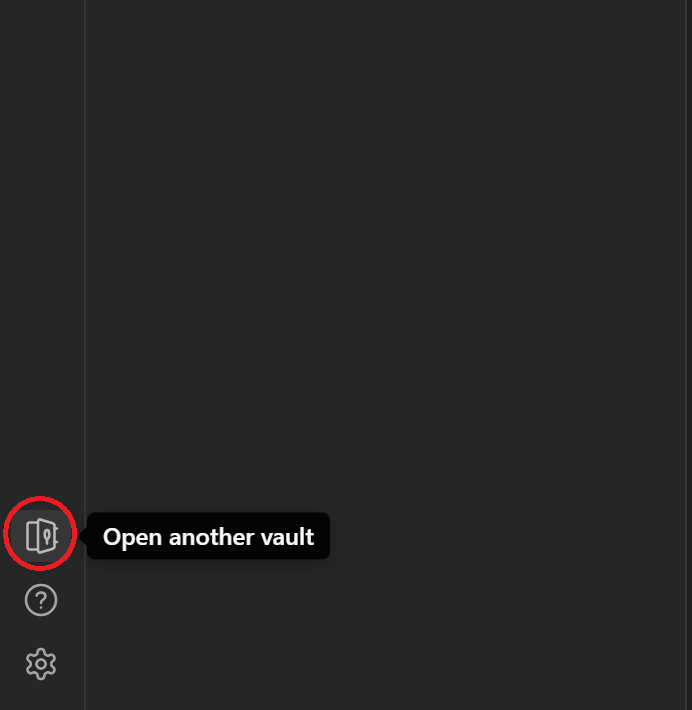
- Click the icon resembling a safe in the bottom left corner. You should see a tooltip that reads: Open Another Vault.
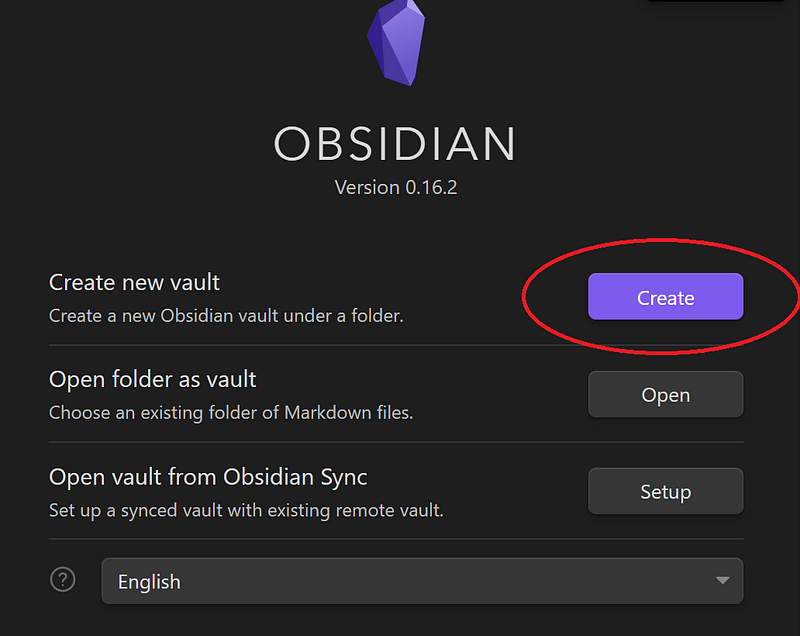
- Select "Create New Vault."
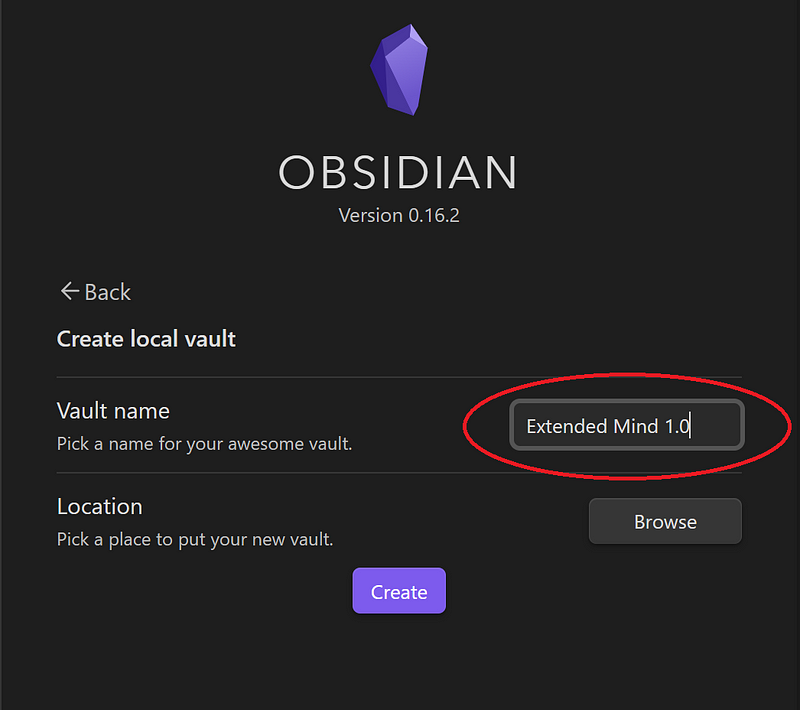
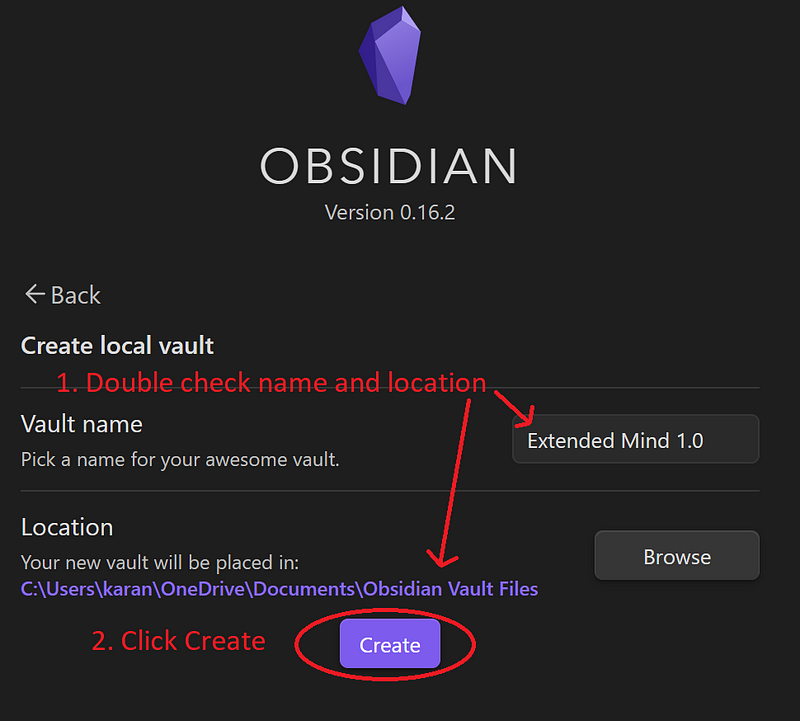
- Input the name you’ve chosen for your new vault.
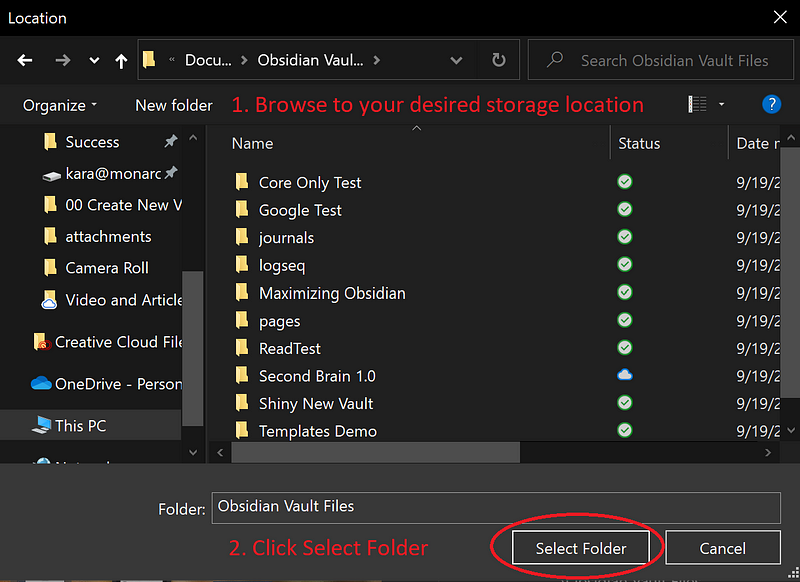
- Now, specify the location for your vault by clicking "Browse."
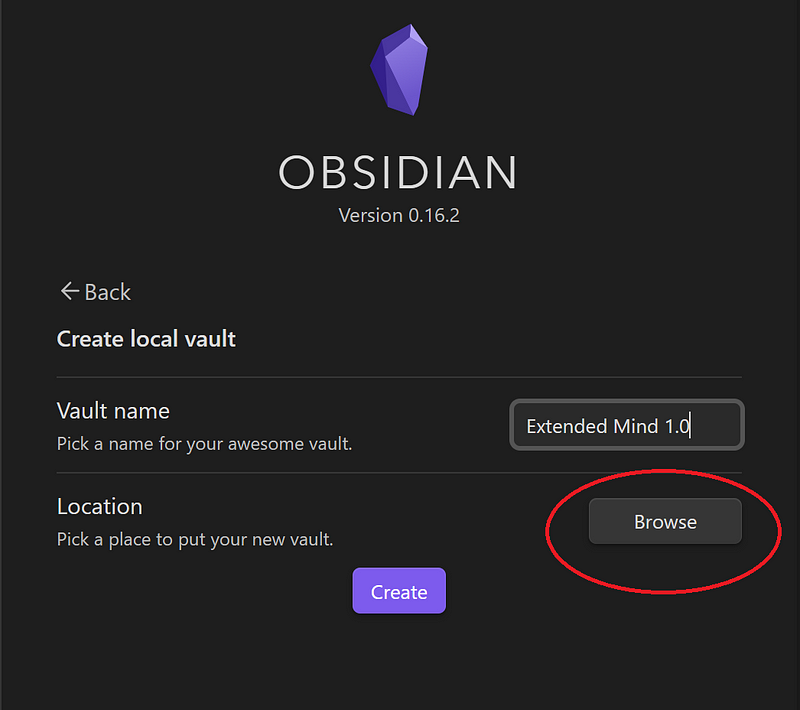
- Navigate to your desired storage location. Once there, click "Select Folder."
- Double-check that the vault name and storage location are correct, then click "Create."
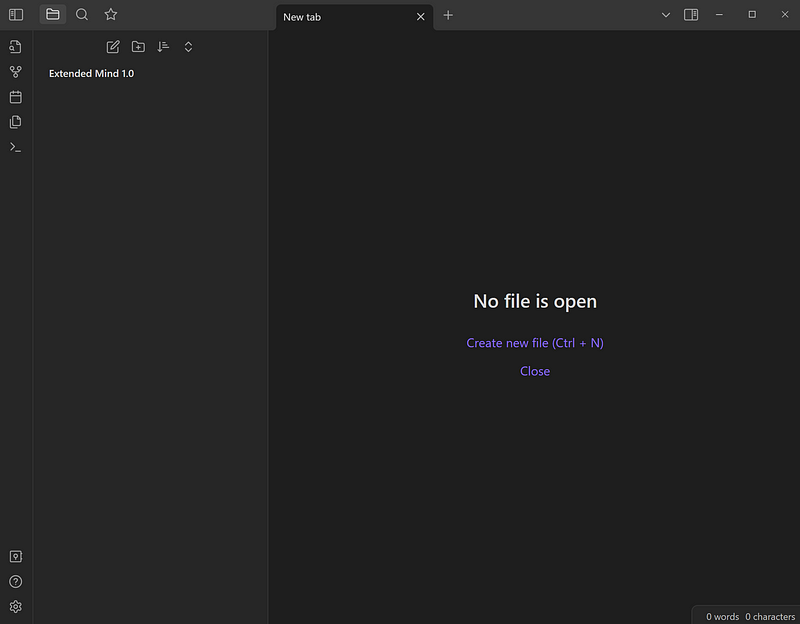
Congratulations! You’ve successfully created your new vault. It will appear similar to this, with your vault name displayed where mine says Extended Mind 1.0.
In the next article and video, we will preconfigure some settings for the vault’s behavior.
Thank you for reading!
If you’d like to stay updated on my latest stories, consider subscribing to my newsletter. I send out a new article and a weekly roundup every Monday morning at no cost.
Are you interested in personalized guidance for setting up your vault or enhancing your productivity with technology? Schedule a free one-on-one coaching session with me to explore whether tailored coaching might suit your needs.