Enhancing Security with Cloudflare Zero Trust for Self-Hosted Apps
Written on
Chapter 1: Introduction to Cloudflare Zero Trust
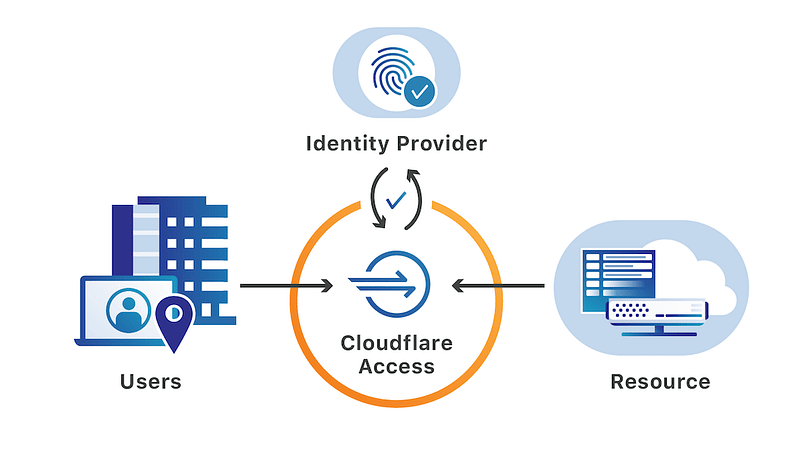
Cloudflare's Zero Trust framework is designed to safeguard your self-hosted, SaaS, and private applications through stringent access policies. Access is granted exclusively to users who meet predefined criteria.
Section 1.1: Vulnerabilities in Self-Hosted Applications
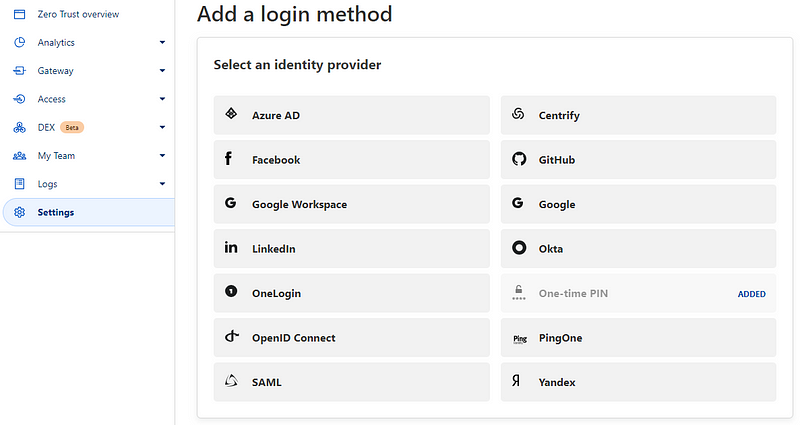
Many self-hosted applications rely on basic authentication, making them vulnerable to brute-force attacks. Cloudflare provides a solution known as Access Applications, which enhances security by adding an authentication layer on top of existing basic methods. For instance, Cloudflare Access can dispatch a one-time PIN (OTP) to registered email addresses, offering an alternative to conventional identity providers. You can set up both OTP and your preferred identity provider simultaneously, allowing users to choose their authentication method.
Subsection 1.1.1: Setting Up Authentication
To begin, navigate to Settings > Authentication and ensure that the One-Time PIN option is enabled in the Login methods section.
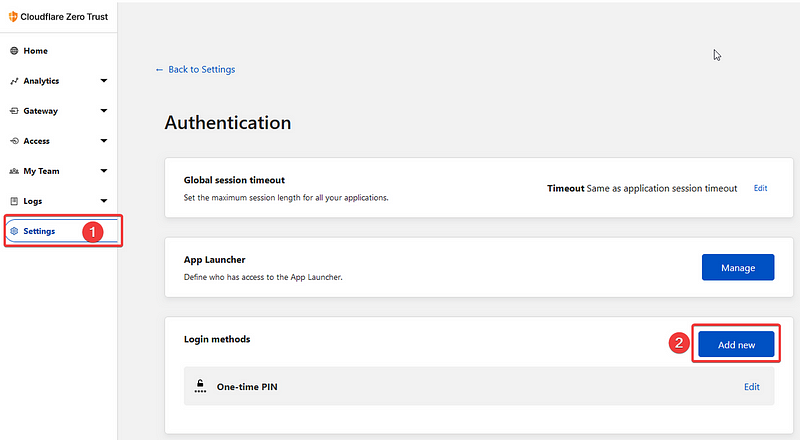
If the option is not visible, click “Add new” and select it from the available choices. No additional configuration is required at this stage. Having already set up your Cloudflare tunnel and public hostname, you can proceed directly to the application builder.
Section 1.2: Creating an Access Application Using One-Time PIN
To create an Access Application, expand the Access menu on the left and select Applications.
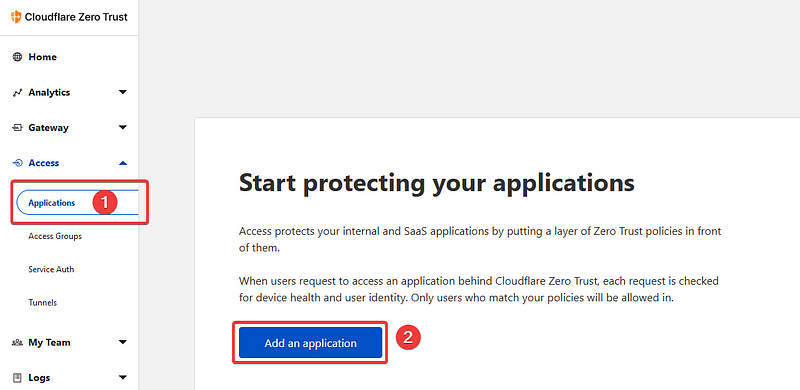
Here, we’ll initiate the creation of our Access Application utilizing the One-Time PIN method.
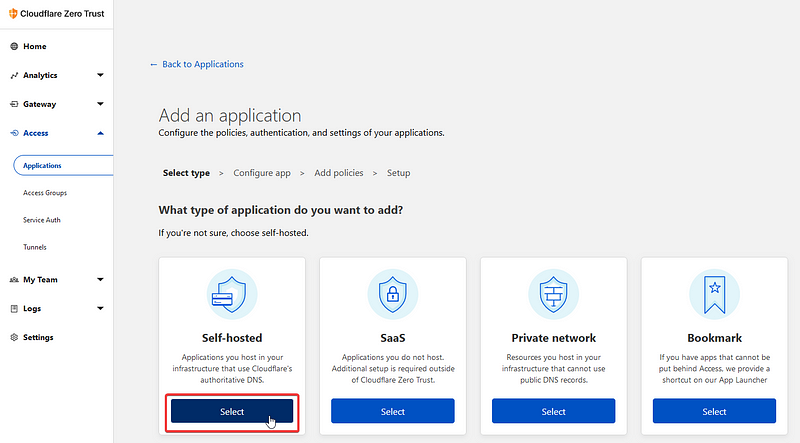
Select the Self-hosted option and proceed. Assign a name to your application; I chose “Login” for my Ghost blog's login page. Specify your domain name and the path you want to secure. For Ghost, the admin page is at /ghost, so we will configure the access application for that specific URL.
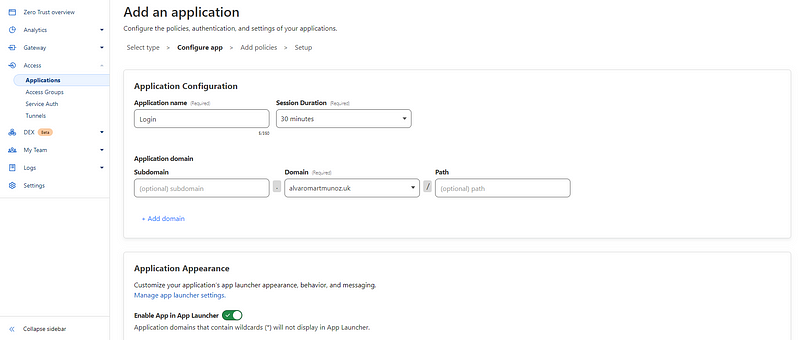
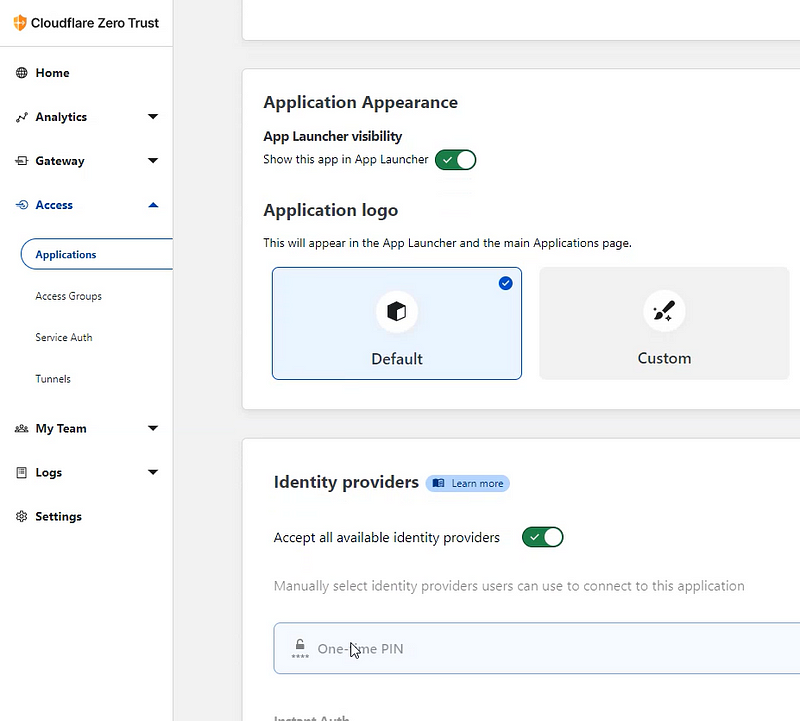
At the bottom, you’ll find the One-Time PIN option under Identity providers. For now, you can leave the other settings unchanged and click “next” at the top.
Enter a name for the policy; I opted for “Login” again, and leave the Action as Allow.
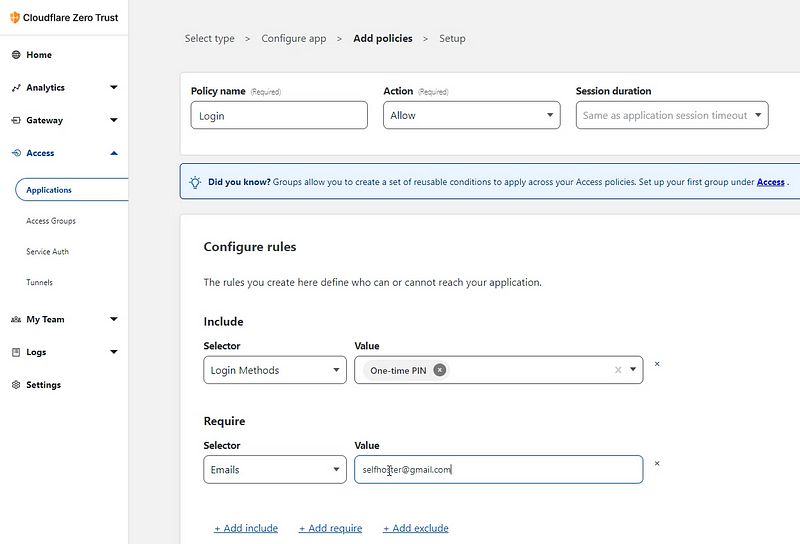
Set the rules by adding the Login method and selecting One-Time PIN as its value. Click +Add require, choose Email, and enter your email address in the value field. After that, click next, then click the Add application button.
Now, you will see the application you just created listed under applications.
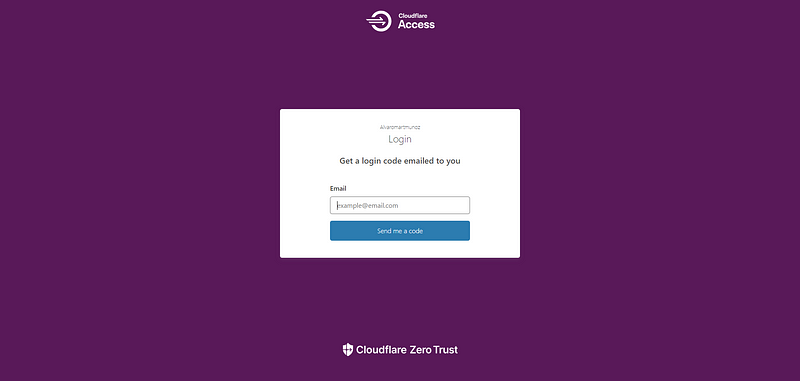
We have numerous platforms to configure the login access:
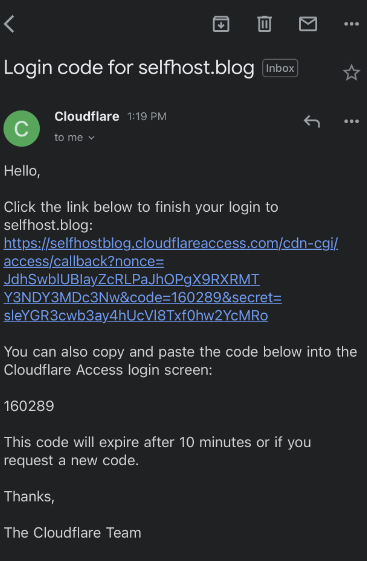
Typically, I receive the emails almost instantly, never waiting more than a few seconds. The One-Time PIN access application provides an excellent additional layer of security for your public-facing applications. It can be implemented in various ways, but I find the One-Time PIN option to be particularly effective for my needs.

Chapter 2: Video Resources
To deepen your understanding of Cloudflare's Zero Trust features, check out the following resources:
This video provides a comprehensive guide to implementing Cloudflare Zero Trust Tunnel, ensuring safe exposure of self-hosted services.
This video explains how to configure Cloudflare Zero Trust policies, adding an extra layer of Access protection for your applications.